


A Guide on Essential Maintenance for Chill Rolls and Rubber Rolls
- Published: April 18, 2019
By Lou Piffer, Senior Sales Engineer, Extrusion Coating, Solution Coating and Cast Film at Davis-Standard
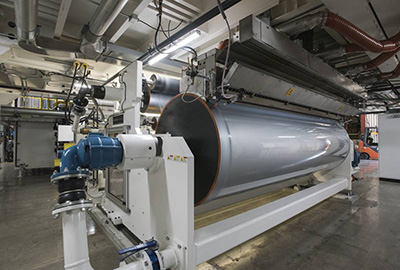 Consistent roll maintenance is a necessary aspect of maximizing cast film and extrusion coating equipment performance and longevity. Following are step-by-step instructions for cleaning chill rolls to remove iron oxides and other build-up, as well as tips for care of rubber-covered rolls, including grinding.
SAFETY NOTE: Always follow the safety recommendations provided by manufacturers when using any of the products/procedures for cleaning chill rolls.
Chill Roll Cleaning
We suggest utilizing the following procedure every six months or until a cleaning cycle schedule is established. The chemical used in the process below is Oakite® 32, a Chemetall BASF product, but there are others available based on preference.
First, make sure you have the right equipment. Recommended would be:
- A pump – Low-capacity (30 to 40 GPM), expendable or acid-resistant; this includes immersible sump-type pumps;
- Open tank – 150 to 200-gallon capacity;
- Flexible hose – 1” to 1.5” (25 to 38mm) internal diameter;
- Fixture to hold roll during cleaning – Rolls should be properly supported to prevent accidental movement during the cleaning process. Damage to the roll and/or personal injury may result if the roll were to shift/move during the process;
- Oakite 32 liquid – Enough to maintain 25 percent solution by volume starting with 50 gallon solution;
- Titration Kit - Use Gardotest Procedure 96 for the concentration of Oakite 32. Use Gardotest Procedure 66 for neutralization of Oakite 32 using Enprox 714; and
- Enprox 714 liquid – Or, equivalent alkaline to neutralize Oakite 32.
Set-up Procedure
- Place the fixture for holding the chill roll as near to the tank as possible (5 to 8 feet).
- Attach the supply rubber hose from the discharge of the sump pump to one of the roll journals using suitable reducers, unions, etc. Do not pass the cleaning solution through the rotary union.
- Attach the return rubber discharge hose to the other journal and to the tank. Discharge of hose must be below the liquid level of tank.
Cleaning Procedure Using Oakite
- Fill the open tank with approximately 50 gallons of fresh water with the sump running to fill the hoses and circulate it through the roll.
- Add sufficient Oakite 32 to the tank for a 25 percent-by-volume solution (approximately one 20 gallon carboy container of acid).
- Continually circulate this solution for 20 minutes. Titrate the solution sample from the tank with a titrating kit supplied by Chemetall BASF.
- When the solution concentration has NOT changed, as indicated by titration, the cleaning is complete. Allow the solution to circulate another 30 to 45 minutes.
- Drain the system as much as possible using the pump by disconnecting the supply hose from the roll journal and draining the system into a drum or other disposal container. Follow the manufacturer’s directions for proper disposal of the solution.
- Add sufficient fresh water to the tank totaling approximately 50 gallons in the complete system.
Add sufficient Enprox 714 as indicated by Gardotest Procedure 66, or equivalent alkaline to fresh water in the tank. Recirculate this solution until litmus paper indicates the solution is neutral or slightly alkaline; pH paper may also be used.
NOTE: The return hose must be lifted above the tank liquid level and the fluid tested on the litmus or pH paper as it exits the return hose.
- Drain the alkaline solution in the recirculating system using the procedure noted in step #5. Then, flush the system with fresh water and drain. It is advisable to add a rust inhibitor to the flushing solution at the end of the cleaning cycle.
Instructions for Titrating Solutions of Oakite 32
Materials Needed:
- Test Kit for Oakite 32: Material #45218539;
- Gardotest Indicator 155, Bromophenol Blue 60 ml #50560514;
- Gardotest Solution 23, 0.5N Sodium Hydroxide 250 ml #50560578;
- Sample Bottle marked at 10-25-50-100 ml mark 1 ea #45218458;
- Pipette, Direct Read, 0 – 5 ml, 1ea #45218454 Dropper; and
- Glass, 0 to 5 ml 1 #45218454.
Procedure:
- Using either the graduation marks on the 120 ml sample bottle or the appropriate dropper, measure out the 2 ml sample volume of Oakite 32 solution to be titrated. Add sufficient water to fill the 120 ml sample bottle about half full. Water can be DI, RO or distilled. Add 10-15 drops of Gardotest Indicator 155 and swirl to mix. The color will be yellow.
- Fill the calibrated direct read pipette exactly to the zero mark with Gardotest Solution 23, and add this to the mixture in the sample bottle, a few drops at a time with swirling between the additions, until the color changes from yellow to blue.
- Record the number of mls used. Call this Titration T. This completes the analysis.
- If a precipitate forms, allow it to settle and observe the color of the supernatant liquid to make sure it is blue. If still yellow, add more Gardotest Solution 23 to a blue endpoint.
- Calculation: Mls of Gardotest Solution 23 used X 2.5 = % by volume Oakite 32.
EXAMPLE: If 100 gallons of Oakite 32 solution tests at 5 percent and recommended concentration is 10 percent, add 5.5 gallons of Oakite 32. If the sample of Oakite 32 being tested contains a large amount of iron, the color at the end of the titration may be green or blue-green instead of pure blue.
Care of Rubber Covered Rolls
For rubber-covered rolls, special care is needed. Following are suggestions that will help protect the surface while enabling you to perform necessary maintenance.
- Support rolls on their journals with covers free of all contact with other objects. The rubber will distort if you lay rolls on their surface. The "Flat Spot" or "Compression Set" caused by contact with another surface can create innumerable problems in machine operation. Unless corrected by grinding, these rolls will not operate properly.
- When the machine is down, open all nips so they will be free from contact with other surfaces. If your machine includes nips that close due to gravity, block these nips in their open position. Pilot-operated check valves are normally used in these cases to hold the nips open for an extended period of time.
- To prevent oxidation, cracking or checking, keep rubber rolls away from steam pipes, boilers, dryers and radiated sunlight.
- When storing, wrap rolls in paper, pack in wooden boxes (preferably cases designed for rolls, and place in a cool, dark place. Rubber-covered rolls stored for long periods of time under certain conditions will show surface cracking or oxidation. Generally, this is only a surface condition and can be corrected with a light grind.
- To correct checking or cracking of rolls caused by long periods of storage, re-grind or re-surface before using.
- Re-grind rubber-covered rolls periodically to maintain maximum economy and quality.
- When removing a roll from a machine, use (a) rope slings supported on the journals with wood blocks taking up the tension, or (b) wide belt slings balanced around the roll surface at the center.
- Keep the roll surface free of machine oil and grease. If necessary, clean the surface with the appropriate solvents for your particular rubber covering.
- Pack rolls safely and securely for shipment, whether for re-grinding or re-covering.
- Inspect stored rolls periodically and rotate when possible.
Grinding and Maintenance Tips:
- Grinding should be done on a regularly scheduled basis.
- To avoid the danger of damaging roll covers or removing too much covering, allow sufficient time forthe grinding operation, taking light cuts on softer rolls.
- If grinders are equipped with dust collectors, dry grind the roll; if not, use wet grind.
- Select a grinding wheel of proper grit size and hardness; maintain proper tension on the wheel belt drive; and keep the carriage drive well-lubricated during grindings.
- During the grinding operation, the wheel should be properly dressed by using a black diamond, diamond tip or star dresser.
- Remove enough of the covering to eliminate all cracks, corrugating and checking.
It’s also important to note the cause of reduced roll life or inefficient operation. These include:
- Incorrect crown, density or thickness;
- Failure to grind the roll periodically;
- Failure to grind the cover below surface checks, corrugations or cracked areas;
- Excessive or uneven operating pressure;
- Incorrect roll body design;
- Roll out of alignment, gears or other equipment in faulty condition;
- Failure to release pressure and lift the roll from the nipped position when not in operation;
- Roll covering not compounded for the specific position and condition;
- Incorrect use of solvents, foam killers, oils and other chemicals that may damage the roll covering;
- Continuing to operate a damaged roll; and
- Allowing the roll to run out of balance.
For more information about this subject, visit www.davis-standard.com or contact Lou Piffer at lpiffer@davis-standard.com.